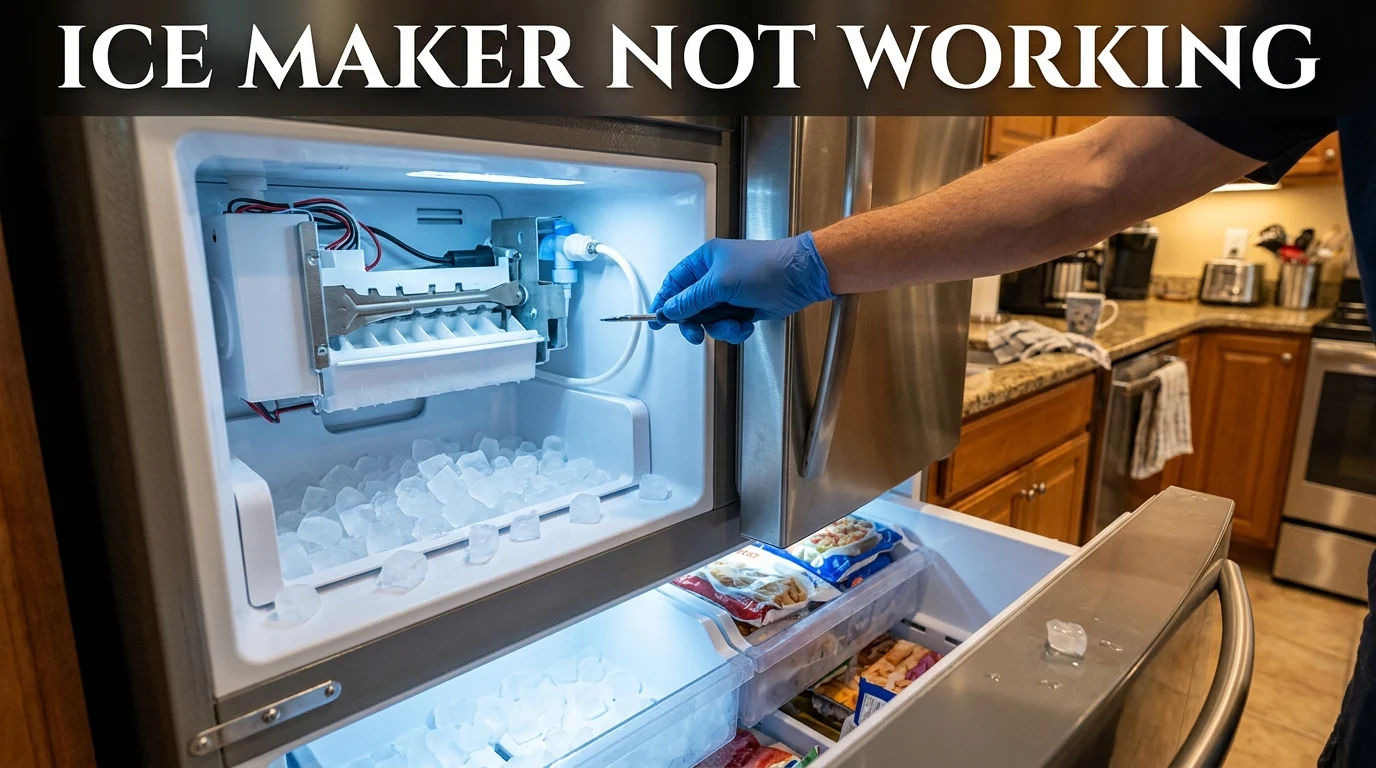
Five things cause almost every case: the shut-off arm sits in the off position, the freezer runs too warm, water isn’t reaching the unit, the filter is clogged, or the fill tube has frozen shut. Check those in order, and you’ll name the problem before you touch a screwdriver.
One thing first. If the whole freezer feels soft or the fridge side is warm, the ice maker isn’t your problem; the cooling system is. That’s a different diagnosis, and our guide on a refrigerator not cooling walks through it.
The 5-Minute Check, in Order
Run these in sequence. Each one rules something out, which matters more than the fix itself.
1. Look at the arm or switch. Older ice makers use a wire arm that rides on top of the ice pile. When the bin fills, the arm lifts and production stops. A bag of frozen peas shoved in the wrong spot does the same thing. Push it back down. Newer models use an infrared sensor or a plain on/off switch to confirm it’s actually on, and wipe the sensor window if there’s frost on it.
2. Confirm the freezer is cold enough. Ice makers won’t cycle above roughly 10°F. Set the freezer to 0°F and give it a full day before judging anything else
3. Test the water dispenser. This is the single most useful thing you can do, and most troubleshooting lists skip it. Hold a glass under the door dispenser. A strong steady flow means your household supply, the shut-off valve, and the water inlet valve are all doing their job, so the fault sits inside the freezer. Weak flow or nothing at all means the problem is upstream, and you can stop looking inside the ice compartment entirely.
That one test cuts your search area in half.
4. Check the filter. Filters need swapping about every six months. A restricted filter often produces water at the dispenser but not enough pressure to fill an ice mold. Cheap aftermarket cartridges restrict flow more than people expect.
5. Feel the fill tube. It’s the small plastic or rubber tube entering the ice maker from the back wall. Frost or a plug of ice there explains everything.
Match Your Symptom to the Cause
| What you’re seeing | Most likely cause | How to confirm | Who fixes it |
| No ice at all, unit silent | Arm off, freezer too warm, or dead module | Watch for a cycle over 24 hours | DIY, then part |
| Cycles, but no water arrives | Frozen fill tube or failed inlet valve | Dispenser test | DIY thaw, or part |
| Cubes hollow or half-size | Low water pressure, weak valve, clogged filter | Check pressure at the valve. | Part |
| Water pooling under the ice maker | Valve leaking, misaligned fill tube | Look for a slow drip between cycles | Part |
| Ice fused into one solid block | Slow cycling, bin sitting unused, valve weeping | Empty bin, watch 48 hours | DIY or part |
| Ice tastes stale or musty | Old filter, absorbed food odors, old ice | Replace filter, dump the bin | DIY |
| Grinding or squealing | Auger jam, stray cube in the mold | Empty and inspect the bin | DIY |
| The bin has ice, but the dispenser won’t drop it | Chute blockage, door switch, auger motor | Remove bin and check the chute | DIY, then part |
When Water Never Reaches the Mold
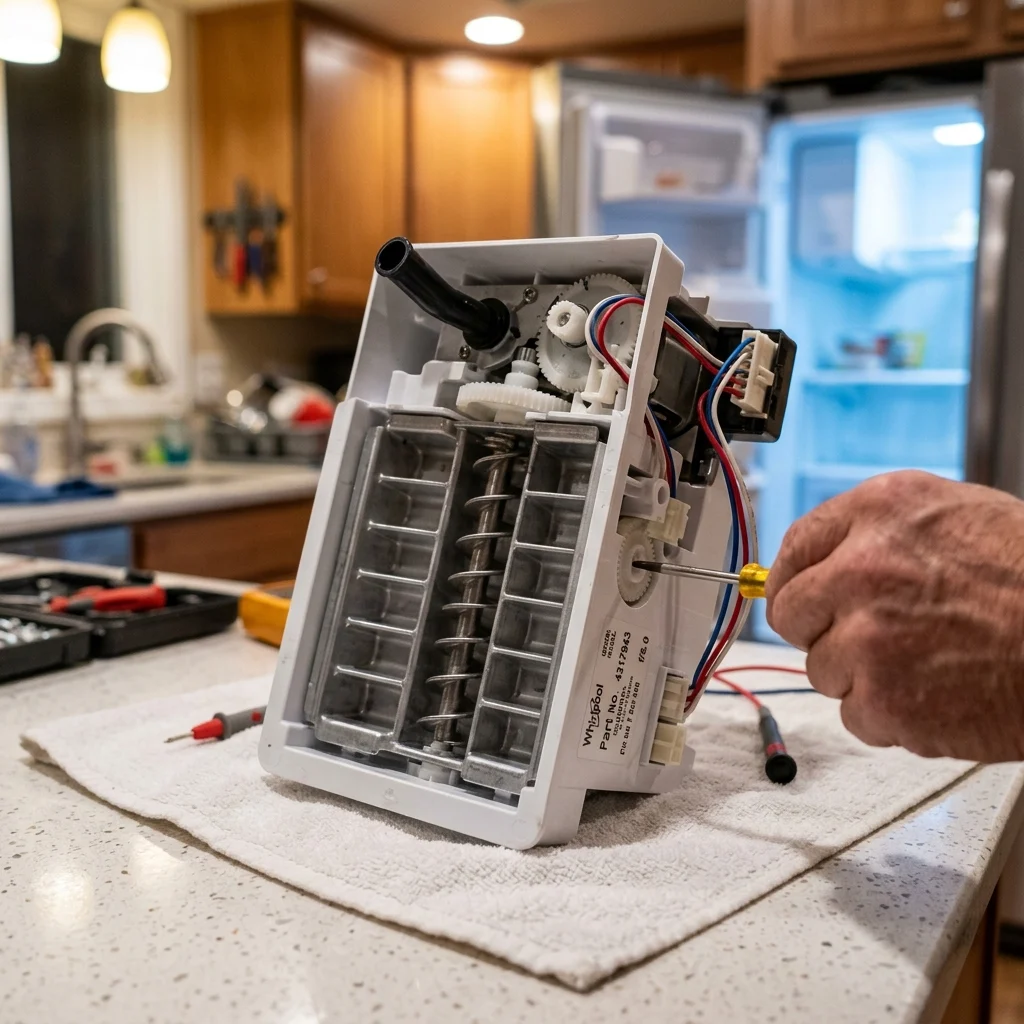
The Frozen Fill Tube
Water enters through a narrow tube that drips into the mold. When that tube freezes, the ice maker keeps cycling on schedule and simply produces nothing. People often hear the mechanism working and assume the motor is fine; it is, it’s just filling with air.
Thaw it with a hair dryer on low, held well back, or with warm water poured through a small funnel. Unplug the fridge first and keep the dryer away from plastic liner panels, which warp fast.
Here’s the part most guides leave out. If the tube refreezes within a day or two, thawing it again is wasted effort. A tube that keeps icing up means the inlet valve isn’t sealing when it’s closed. A trickle keeps reaching the tube between cycles and freezes there. The valve is the actual fault; the ice is the symptom.
The Water Inlet Valve
This is the electric valve at the back of the fridge where the household supply line connects. The ice maker signals it to open, it lets a measured amount of water through, and then it closes.
It needs about 20 psi of household pressure to operate. Below that, the mold underfills, and you get hollow, half-formed cubes, a classic sign that gets misread as a broken ice maker.
Valves fail two ways, and the symptoms are opposites. A valve that won’t open gives you no water at all. A valve that won’t fully close weeps, which freezes the fill tube and clumps the ice.
Before condemning it, pull the inlet screen and clean it. In hard-water areas, mineral scale on that screen chokes flow while the valve itself is perfectly healthy. If the screen is clear, you can test the solenoid with a multimeter on the terminals with the fridge unplugged a working coil typically reads in the low hundreds of ohms, while OL means the coil is dead and the valve needs replacing.
The Supply Line and Filter
Follow the line from the wall to the fridge. A kink behind the unit, from the last time someone pushed it back too far, starves the valve. So does a partly closed shut-off valve, and older saddle valves clog with sediment over time.
On filters: reseat the cartridge fully, then run a few glasses of water through the dispenser to purge trapped air. Sub-Zero and some built-ins are the exception worth flagging they use a separate filter and a dedicated ice-maker valve, so a working dispenser tells you nothing about the ice side on those models. Our luxury appliance repair team handles these builds regularly.
Water Arrives, Ice Never Forms
If the mold fills but nothing hardens, look at heat getting into the compartment.
The ice compartment on many French-door models is sealed off from the fridge cavity by a rubber grommet. When that seal fails, humid air leaks in, and the whole assembly frosts over. Heavy frost coating the ice maker itself is the tell.
Frequent door opening in a Brooklyn summer does the same thing more slowly. So does a torn door gasket.
Give the timing room, too. A refrigerator ice maker produces a batch roughly every 90 minutes under good conditions, and after any reset or repair, the first cubes can take one to three hours. Judge the outcome at 24 hours, not at lunchtime.
Ice Forms but Never Drops
Cubes that form and then sit there point to the harvest side.
The ejector arms sweep finished cubes out of the mold and past the stripper teeth. A single stray cube wedged in the wrong place locks the whole mechanism. Empty the bin completely and look at the mold; this fix takes two minutes and solves more calls than it should.
The mold heater is the other suspect. It warms the mold just enough to release the ice. When it fails, the cubes stay frozen in place, and the motor stalls against them.
Separate this from a dispenser fault. If the bin holds plenty of ice but nothing comes out of the door, the ice maker is working fine and the problem is the chute, the auger motor, or the door switch.
How to Reset an Ice Maker
Some units have a recessed reset button under a cover plate. Press and hold it for a few seconds and listen for the motor to begin a test cycle.
No button? Switch the ice maker off, unplug the fridge, wait five minutes, plug it back in, and switch the ice maker on.
Be clear about what this does. A reset clears a stuck control state, nothing more. It won’t thaw a fill tube, open a dead valve, or unjam an ejector. If the ice maker is dry again 24 hours after a reset, the reset wasn’t the answer, and the real fault is still sitting there.
Testing the Ice Maker Module Yourself
Most modular ice makers, including many Whirlpool and KitchenAid units, have three small test points on the module face marked T, L, and N. Bridging them with a jumper forces a manual fill-and-harvest cycle, which tells you within minutes whether the module responds and whether water arrives.
Only attempt this if you’re comfortable working around a live circuit. You’re bridging powered contacts inside a freezer with dry hands, no standing water, and no metal jewelry. If any of that gives you pause, it’s a reasonable place to stop and call someone. A cracked module is a cheap part; a shock is not worth the diagnosis.
Brand Quirks Worth Knowing
- Samsung: French-door models frost the ice compartment when the grommet seal between the fridge cavity and the ice room fails. Frost on the assembly itself is the giveaway.
- Whirlpool and KitchenAid: use the modular design with the T/L/N test points described above, which makes them the easiest to diagnose at home.
- Frigidaire: failures cluster around the fill tube and the control arm getting bumped up by a full bin.
- GE Profile and Café: units fail at the inlet valve far more often than at the ice maker itself. If the door dispenser also runs slow, that’s your answer.
- LG: issues tend to sit in the auger and dispenser motor rather than the ice production side.
- Sub-Zero: built-ins have that separate ice-only valve and filter check both.
What Ice Maker Repairs Cost
A water inlet valve is an inexpensive part, and the labor is short since it sits at the back of the cabinet. A complete ice maker assembly costs more but is usually a straight swap rather than a repair. For a fuller breakdown of what different jobs typically run, see our Brooklyn appliance repair cost guide.
The judgment call is repeat failure. Replacing a fill tube situation twice, or a valve that fails again within a year, usually means water quality or pressure is the underlying issue and the part is just the casualty. Worth diagnosing properly instead of buying valves annually.
Keeping It From Happening Again
Replace the filter every six months and write the date on the cartridge. Use the ice a bin that sits untouched for weeks and fuses into a block regardless of how well the machine works. Keep the freezer at 0°F rather than nudging it warmer to save energy, because ice production slows noticeably above that. And if your building has hard water, plan on cleaning the valve inlet screen once a year.
If none of this clears it up, our refrigerator repair technicians can diagnose the exact part on-site, usually the same day.
Frequently Asked Questions
What’s the most common reason a refrigerator ice maker stops working?
A frozen fill tube. Water gets blocked before it reaches the mold, the ice maker keeps cycling on schedule, and nothing comes out. The shut-off arm sitting in the off position is a close second and takes two seconds to check.
How long after a reset before I get ice?
The first cubes usually appear within one to three hours. Give it a full 24 hours before deciding it failed. No ice at all after a day means the reset didn’t address the real fault.
My water dispenser works, but the ice maker doesn’t. Why?
Working water at the door means your supply, pressure, and inlet valve are fine, so the fault is inside the freezer, usually a frozen fill tube, a jammed ejector, or a dead module. Sub-Zero and some built-ins are exceptions with a separate ice-only valve.
How do I know if the ice maker or the valve is bad?
No water arriving at all points to the valve or a frozen tube. Water arriving but nothing cycling points to the module. Force a test cycle and watch whether water enters the mold that single observation splits the two.
Why are my ice cubes hollow or too small?
The mold isn’t filling completely. Low household water pressure, a weak inlet valve, or a clogged filter all starve the fill cycle. Ice makers need roughly 20 psi at the valve to fill properly.
How long does a refrigerator ice maker last?
Most run five to ten years before the assembly needs replacing. Water quality matters more than age hard water shortens that span considerably.
Can I run the ice maker without a filter?
Many fridges accept a bypass plug in place of the cartridge, which restores full flow. Ice quality suffers and scale builds faster, so it’s a stopgap while you wait on a replacement, not a plan.